E-mail:Summer@fsorgin.com Telephone: +86 151-1302-4743
- All
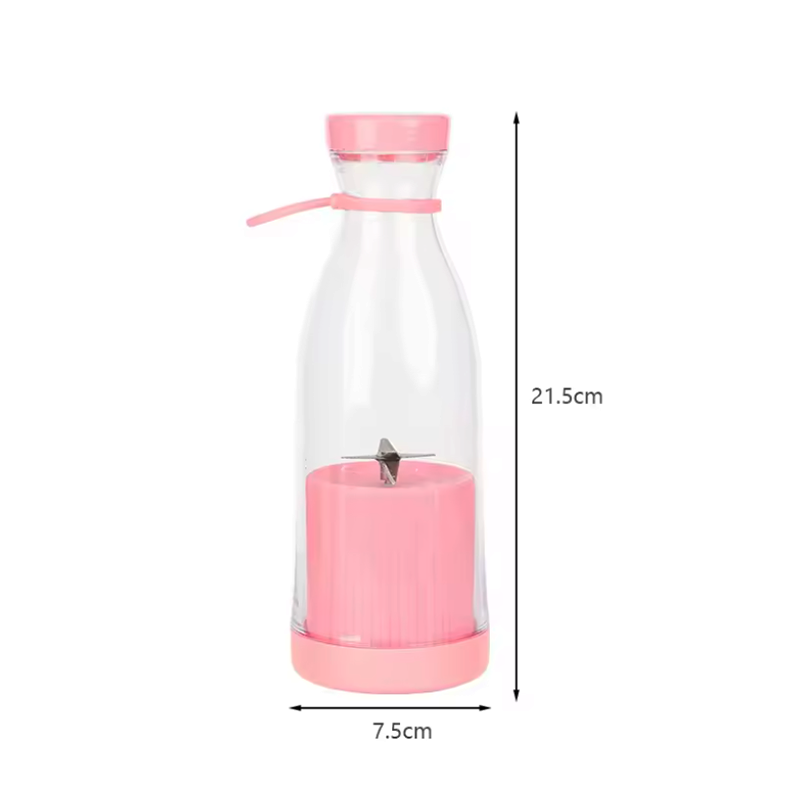
- Product Name
- Product Keyword
- Product Model
- Product Summary
- Product Description
- Multi Field Search
English


JG-006
| Quantity: | |
|---|---|


Initial Charge: Before using the blender for the first time, fully charge the battery. This usually takes a few hours and ensures you have maximum power for your first use.
Regular Charging: Charge the blender after each use to keep it ready for the next time. Most portable blenders have a USB charging port, so you can charge them using a wall adapter, computer, or power bank.
Chop Ingredients: Cut fruits, vegetables, and other ingredients into small pieces to ensure they blend smoothly and quickly.
Add Liquids: For a smoother blend, add liquids like water, milk, or juice to the container first. This helps the blades mix the ingredients more effectively.
Layer Ingredients: Place harder ingredients at the bottom and softer ones on top. This helps the blender process the ingredients more efficiently.
Attach the Blade: Make sure the blade is securely attached to the base of the container. Some models have a twist-on mechanism to ensure it is tight and secure.
Close the Lid: Ensure the lid is properly sealed to prevent spills. Some blenders have a vented lid for adding ingredients during blending.
Turn On the Blender: Press the power button or activate the blending function according to the manufacturer's instructions. Most portable blenders have one or more speed settings.
Pulse or Continuous Blend: Use the pulse function for short bursts to mix ingredients, or use the continuous blend for a smoother consistency. Start at a lower speed and gradually increase if needed.
Check Consistency: Stop the blender periodically to check the consistency of your blend. If it’s too thick, add more liquid. If it’s too thin, add more solid ingredients.
Pour the Drink: Once the blend is smooth, carefully pour it into a glass or bottle. Some blenders have a spout or a wide mouth for easy pouring.
Enjoy Your Drink: Consume your drink immediately for the best flavor and nutritional benefits.
Immediate Cleaning: Clean the blender immediately after use to prevent ingredients from drying and sticking to the container.
Disassemble: Remove the blade and lid from the container. Some parts may be dishwasher safe, but check the manufacturer's instructions.
Hand Wash: If the parts are not dishwasher safe, wash them with warm, soapy water and a soft sponge or brush. Rinse thoroughly and dry.
Self-Cleaning Function: Some blenders have a self-cleaning function. Add a small amount of water and a drop of dish soap, then run the blender for a few seconds. Rinse thoroughly afterward.


